Monday, 21 September 2015

Let them eat cake! Jalie Eleonores and Kirsten Kimono Tee


I'm on a kick right now, sewing up lots of basics (Cake!).  Having two pairs of jeans that don't fit well at all, I was desperate for something comfy to wear on the weekends.  Being petrified of sewing a fly front, I chose the new Jalie pattern, Eleonore.  I've made three pairs, blue, grey and black.  All three fit differently as the fabrics are quite different.  The black ones (which I have no photos of - black does not photograph well, and they are constantly in the laundry) are a high quality bengaline with lots of stretch and good recovery.  The fabric was from The Fabric Store in Auckland.  It was the only stretch woven I could find there with the required 20% stretch.  They are the most comfortable pair.

The grey and blue ones were made with stretch wovens from Dress Smart fabrics in Auckland, it's a great little store with a wide variety of mostly synthetics.  The grey ones (pictured below with the kimono tee) are not very stretchy, and the least comfortable pair.  The blue ones are nice and comfortable, but as my DH says, the polyester material looks like something from a cheap uniform.
Here's some pics of the blue ones:

You can't see the details well in these shots, but they have rear pockets, a back yoke and fake front pockets/yoke.  They are great everyday pants, and with an elastic waist they are a really quick sew.

The pattern was great, I had some trouble fitting the pants, I was a size T at the waist, and V at the hips, I had to still take in another inch at the waist, and stretch the elastic at the back to prevent gaping (as per Dawn's review).  I also had to add 2" to the calves, and 1.5" to the thighs as my legs are quite large.  This explains why it's impossible to buy RTW pants that are not wide leg and belted.

The next set of photos is the Kirsten Kimono Tee from Maria Denmark (Free :) ), it was really quick to sew up, but I forgot to add a hem allowance, so it's shorter than I would have liked.  The fabric is a good quality cotton knit from the Fabric Store, but was very off-grain, so although I had bought it to make a tank dress, I couldn't get two full length pieces out with the stripes staying horizontal.  I made no alterations to the pattern, but instead of going by the measurements, I measured the flat pattern pieces, and used the size that gave me 1" of ease across the bust.  I added a bias strip at the neckline, using the bias even though it's a knit to get the stripe pattern.  I used steam-a-seam lite for the sleeve hems and bottom hem.  Looking at the two outfit photos I can see that the kimono sleeve tee is definitely too short to wear with those pants, so I'll probably wear it with some of my more casual skirts.


Saturday, 12 September 2015

Black Tie Jumpsuit - Burdastyle 06/2015

I'm back!  I was rowing for the past year, and was too busy for sewing.  Rowing is over now, so I'm finally back to sewing.  I made this jumpsuit for my rowing club's black tie ball.  (well, it was originally black tie, but was downgraded to cocktail attire due to complaints (and much to my husband's relief).

Pic from the rowing ball (most of the pics didn't turn out well, this is the best I've got)

The crossover is in the center, the buttons are off.  I had picked up gold buttons, but couldn't find them the afternoon of the ball when I was finally sewing the buttons on.

Sorry for the wrinkles!  I gave it a quick iron, but it's been sitting on my ironing board for months now, and I finally needed it to move on.


 Excuse the expression, I was going to crop my head out, but yeah.  Early on a Saturday morning.


I love jumpsuits, and this was my second of many to come.  I think I will live in them for the summer.  I used Burdastyle Evening Jumpsuit 06/2015 #119C as my base pattern.  The halter pieces had way too much fabric, you can see this problem on the photo on their website).
Here are the changes I made:

I cut the fabric on the two halter pieces down by half (probably a bit too much) as it was an evening function.  It's not an outfit I'd be comfortable in during the day :) .  I also changed the tie to buttons for a more formal look.  I made little button loops out of the main fabric.

I also added ties, attached at both sides and wrapping around to the front they are long enough to wrap around to the back for a more practical look..

I put pockets in the sides, and moved the zipper to the centre back, because I didn't want to deal with putting in a side zipper with pockets and ties.

I underlined the waist pieces, on the cross-grain to add some stability.  I lined the halter pieces, and had planned on lining the waist as well, but ran out of time.


Thursday, 15 May 2014

Rebirth

Well, I'm back.  Not sure anyone's still around, but I thought I'd start up again as my sewing is ramping up and I need some accountability . . .

I disappeared for the last year and a half due to this little guy:
Yep, I procreated again.  It was the pregnancy from hell, but now that he's here (and 8 months old) things have settled down again.

Anyway, onwards and upwards, I have been stalking sewing blogs and artisan's square gaining inspiration, and I am jumping in with both feet to do a 6PAC (see info here, I'm doing a winter 6PAC cause I live in NZ).  I am in desperate need of work clothes, I am finally at a happy weight (15 pounds below my pre-baby weight) and nothing fits.

My plan is as follows:
All of the fabrics are out of my stash, which has grown considerably as I seem to have much more time for fabric shopping than for sewing.  I am headed to a sewing retreat this weekend, and hope to get muslins for the skirts and dress bodice stitched up. 

Friday, 28 December 2012

Mad Men Dress - Butterick 6582

I've been absent for awhile, but have been sewing!  I find it hard to find time for pics, but I guess I need to start using my dress form more . . .


I made this dress as my 'Christmas' dress.  It's retro Butterick 6582.  I had my husband's work party, and a friend's 'mad men' themed party to go to.  I splurged on the fabric (a silk-cotton blend) because I figured if I bought a dress in a store it would cost much more :)  .  Turns out  and I didn't buy quite enough, so I had to split the back pattern pieces into two (top and bottom).   I also put the zipper in by hand, I like the feel of it (it feels more flexible than an invisible zip) and the zipper is cheaper.  I also put in a kick pleat at the bottom, using instructions from Threads.


The dress is underlined, but not lined, as it's a summer dress, and I didn't want to take the time to sew
a lining and insert it by hand. 

I'm not sure about the fit, I think I got it right through the waist and hips, but I had issues with the bust and shoulders. It really needed a FBA, I did a lazy FBA by increasing the side seams by 1/4" on each front piece and taking in the darts by 1/4", but it wasn't enough.  I just wasn't sure how to do a real FBA with the lines of the pattern (it's like a one-shoulder dress with a piece added for the other shoulder, and double darts).  I wanted it to be pretty form fitting, like a 'wiggle' dress, but man, women must have had to make lots of alterations, or wear lots of shapewear back then. 

 I can't really tell how it's supposed to fit, here's the pattern envelope (I made the blue version): 

Saturday, 27 October 2012

Frankenpattern

Another sewing first for me - a frankenpattern!  I've worn my burda tunic dress to death over the last 6 months, and as it's a cheap doubleknit, it was pilled badly around the hips.  So, I did what any enterprising sewer with leftover fabric would do, and I cut off the bottom, took in the sides and sewed on a new skirt that I traced from a dress that fits well.  Without further ado here's the original:
 And here's the new version.  The belt is too big, but it looks better with a belt, so here I'm pinching two inches out of the back of the belt.
 I bought these shoes when I was back in the States in June, I hadn't had an opportunity to wear them, but this is the perfect dress to wear them with.  They have teal, blue and purple, so are too busy to wear with anything patterned, but I don't have much that coordinates (which begs the question - why did I buy them?)


And the obligatory side view.  Not much to note about the pattern, it doens't hang perfectly, but it's better than anything I can buy in the store (being 5'11" and a long torso it's near impossible to buy a dress off the rack)


Overall it was an hour on a Friday night well spent.  I have been sewing other things, but they're all pretty boring.  Now that the weather's warming up I have a few summer dresses creeping to the top of my queue.

Thursday, 27 September 2012

Home Sewn

I went to the Home Sewn exhibition, a pop-up exhibition celebrating New Zealand home sewing.  It was pretty well done, but small.  There were about 30 odd dresses, from the 1930's to now.  Here are a couple of my favorites

 This one was so cute, and impeccably sewn.  I love the green contrast on the bodice and pockets. 
 I liked the cut-on sleeves on this one, and the belt is homemade as well.  Very cute. 
 This was a very simple sheath dress, but I thought the shaping on the side was genius.  It had two panels curved in to add shape to the bodice.  I haven't seen anything like it. 
 Finally, they had a few cases of 'treasures' most of it I had seen before, but this trouser presser was new to me.  My husband can't even get me to iron his shirts, never mind press creases in his pants.  I don't really get how this can make life easier though, wouldn't an iron be almost as good?
The main reason I went to the exhibit though was to buy the book.  They published a book with the history of home-sewing and fashion in New Zealand.  As an added bonus, there are 10 patterns from 10 different designers in NZ.  Papercut Patterns has a great skirt pattern in it that I'm dying to try.  After the exhibit I went to a little coffee shop around the corner, in Queen's Arcade, they have the best coffee and coconut rough slices in Auckland.  The book is great, well worth the money.

Sunday, 16 September 2012

The Seamless Pledge


I'm the featured pledger today on Len's awesome blog Seamless.  As I said there I'm still committed to the pledge, with the occasional slip. I work full-time and try to spend as much time as possible with my little one, so I do the best I can.  It's carried over to other aspects of our life.  We moved to New Zealand to try to become less consumption focused, and we try to avoid buying things, except what we really need.  I'm sure as the little one grows he'll become more demanding, but for now he doesn't care.

I have been sewing (slowly)  I attended a great sewing retreat yesterday, organized by Ange and Anissa.  I spent most of my time basting organza to wool for my upcoming peplum top, but I also cut out stencils to make my son some new t-shirts/singlets.  I bought him a Spiderman t-shirt a week ago, and he's been wearing it non-stop.  Instead of buying him more expensive (and gaudy) superhero t-shirts I decided to make some myself with plain shirts.  Here he is in his Superman t-shirt.


And his best superman impression:

He loves it.  I also made his pants, elephant pants v.2.0 (the first pair was pants, became high-waders and then shorts as he grew).  I also need to stop cutting his hair myself . . .

(Edited to add additional photo and expand text)

Thursday, 13 September 2012

My sewing space - before picture


I was so excited to come home today to a little package in the mailbox, my new sewing fabric!  I know the keep calm thing has been done to death, but I love it :)  . 
I have decided to do a mini-sewing area makeover to make it a bit prettier.  Here is what my sewing corner looks like now:

My current sewing space is a corner of our kitchen, so I share my storage space with plates and bowls.  When we moved in I took over the closed-in porch as a sewing space, but it was too cold, and small, so now it's just fabric storage.  I have a very understanding husband. 

It's a little cramped.  The desk is on sliders, so I can slide it out a bit.  The frame on the wall has a 4"x4" (10cmx10cm) cross-stitch of my face, my husband has a matching one.  When he was living in NZ and I was in the States I used to fly on points to visit him, 30 hours each way.  I did most of the cross stitches on the journey.  

 I keep my current projects in two bins in the buffet.  The other two doors hold our dishes. 


My plans are pretty basic, as we're moving into a new place in 3-4 months.  I am going to paint and recover the stool with the awesome keep calm fabric. 
I'm also going to paint the desk white, with two metallic stripes that cross on the top.  I'll get new handles as well.   It's finally starting to warm up here, so I'm hoping that I'll get the painting done by October.

Saturday, 8 September 2012

Burdastyle Dress 08/2012 #115


I needed a casual, comfortable dress for weekends, and I have been dying to make a peplum top, so I made Burdastyle 08/2012 #115 as a 'wearable muslin' (well, I first made an unwearable muslin, then made the dress).  It was quick and dirty.  Serged edges inside, machine stitched hem.  The only thing I hand-stitched was the zipper and the hook and eye.  The pattern includes lines to cut off the skirt into a peplum, so that's what I'll be undertaking in the next couple of weeks.

I was too cheap/lazy to get an invisible zipper, so I did a hand picked zipper instead.  I quite like the look.

I wore it today to Wynyard Quarter, a newly re-vamped industrial area of Auckland.  It's Auckland fashion week and unbeknownst to us they were having a big fashion event (sale?) in the building behind me.  The fashionistas were out in full force, and I can say that not a one was wearing a floral dress with bare legs.  I guess I'm ahead of the curve, or something . .  .
The other benefit of Wynyard Quarter is that the Auckland fish market is there, so we stopped for fish and chips before heading home.  Here's Mr. RP, wearing a homemade merino t.  The little one did not appreciate the pause for a picture.  
Here are some more shots of the dress.
I'm not a huge fan of the proportions.  I don't own any full skirt dresses, and I think they just aren't very flattering for my shape.  I added the belt to break up the pattern a bit, it's quite overpowering.  I also chopped the sleeves off at 3/4 length.  Initially I had them at full length and they were awful.  I don't own any dresses with full length sleeves, and I think it's the same thing, just not a flattering look on my figure. 

The back hem is a bit longer than the front.  I'm not sure if that's what the pattern intended, but the waistline has the same shape.  I like the mini high-low look that's going on, so I'm not going to fix it.  I do need to lower the waistline about an inch all around though.  I did lower it 3/4" from the original, but I think it's still too high. 

Thursday, 30 August 2012

McCalls 5927 - 6PAC continued

I finished my blue work dress, McCalls 5927.  I've been working on it for over a month.  First I couldn't find the lining fabric, then once I found the lining fabric I couldn't find the fashion fabric I had cut out.  It finally all came together last weekend, and I managed to get it sewn up and lined over the last few evenings. 
 Here you can see more of the details, there are four pleats in the front and two darts in the back.  There are also pockets in the front, I did the pocket bags in a polka dot silk/cotton blend that I had in my stash, and it wasn't the best idea because when I sit you can see it. 
I like the dress, the fit's not perfect, I did a muslin, but I didn't pick up on the fact I needed a small FBA and the armholes are too big.  I'll leave this version alone, but when I make it again I'll fix it. 

 The back has a slit, which I think seems kind of cheap.  I'll definitely either remove it or put a vent in my next version.  I guess it's kind of lazy sewing.  I put the zipper in by hand.  I think I'll be wearing this alot, and I didn't want to deal with an invisible zip breaking.  Next time I may try a lapped zip, or move the zip to the side. 
Here's the side, you can see that the armhole pulls a bit in the front.  Definitely better than RTW though. 
Overall I'm pretty happy with the dress.  My sewing skills are getting better.  I still have a long way to go, but I don't think this screams 'homemade' (except the pockets, oh well). 
The lining is really comfortable, it's not sticky or crinkly like most of the linings that I use (I don't think it's actually a lining fabric, it was expensive, and is quite pretty)
This was item #2 of my Spring 6PAC, At two a month I might actually get through the set before Spring is over.

Monday, 27 August 2012

Craftsy Couture Dress - wedding outfits


My brother got married in June, I've been waiting (not so patiently) for some photos from the wedding, but as none seem to be forthcoming I thought I'd put this post together anyway. 

In February I decided to make my dress for the wedding, following Susan Khalje's couture dress course.  I thought it would be a good way to pick up new skills, and it far exceeded my expectations.  As a novice, I learned so much from the course. 

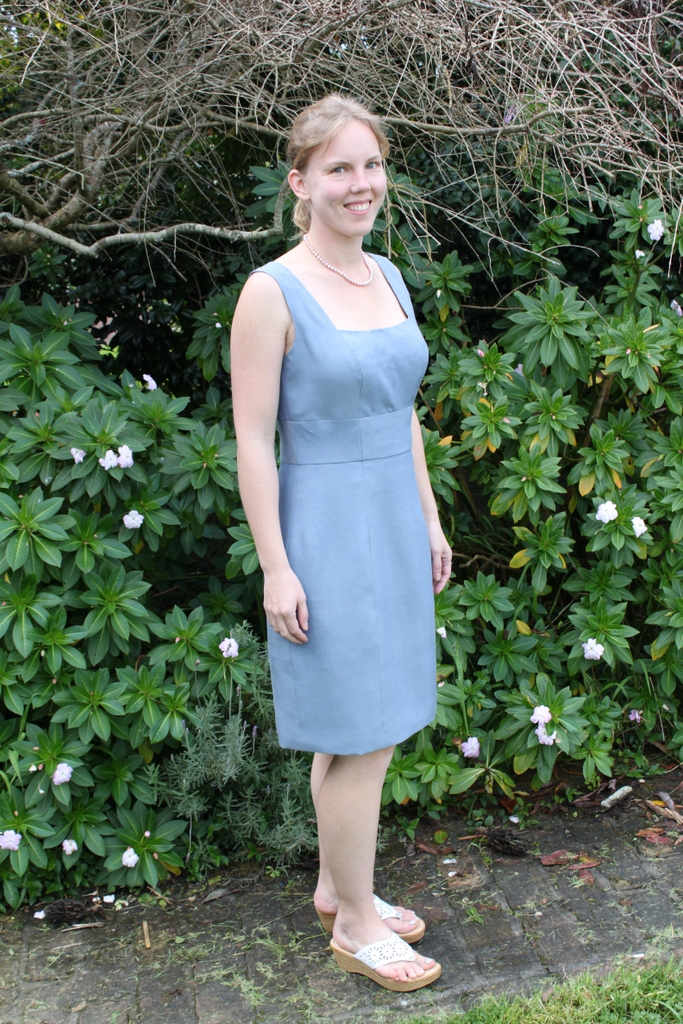
I had picked up a gorgeous medium weight silk-cotton blend last year, and I knew it would be perfect for the dress.  I underlined with silk organza, and lined with china silk (both ordered from Dharma trading).  The dress itself is nothing special, I used the pattern that came with the course, Vogue 8648, the sleeveless, slim skirt version. 


I think I did a pretty good job fitting the front, but the back was not as good.  I have lost some weight since the wedding, so I think it fit me better back then.

I used swarovski seed beads in pewter to accent the hand picked zipper.  The dress was fairly plain and I wanted a little extra oomph.
The dress took a _really_ long time to sew.  Most of the techniques were new to me, and I estimate that I spent 60-70 hours on the dress.  At the same time I was making vests and pants for the three ring-bearers / junior ushers.  Two of them live across the ocean from me so I had to mail trial versions (yes multiple versions) to get the fit right.  I got a great deal on a British super 100s lightweight wool suiting.  It was a dream to sew.  The vests were fully lined and had real welt pockets (my first time doing welt pockets), but for the pants I ran out of time, and did fake fly fronts for the two littlest boys. 
I left my son's outfit behind, so all I have is this iphone picture from my sister:
This was well into the wedding, he's working on a chocolate sucker.  I made his backpack as well - but not specifically for the wedding :)